1 Algorithm#
Danger
In case you do not know how our GUI handles plugins, please take a quick look at the part Developing Plugins in our Readme.
1.1 Overview#
Warning
Depending on what your algorithm should do, you will need only one of the two subsections below.
1.2 Algorithm, which creates annotations to be plotted:
see what that means in a video (02:04 to 02:20)
use the code example
1.3 Algorithm, which calculates features for existing annotations:
see what that means in a video (02:21 to 02:39)
use the code example
Using the working example
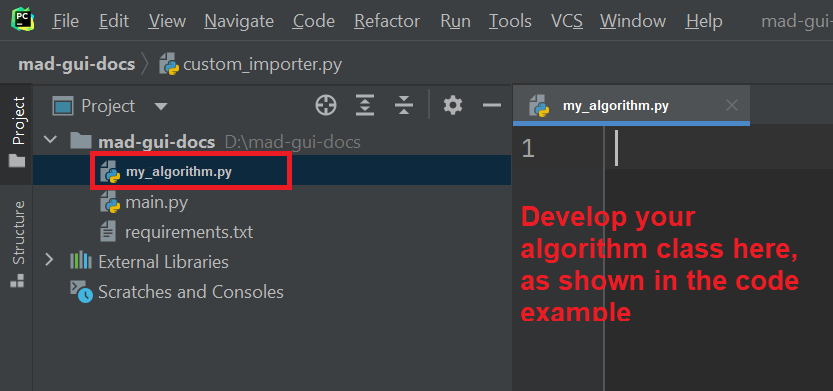
The two subsections below show working examples, which you can adapt for your specific algorithm. To run one of them:
create a file as shown in this image
copy one of the code snippets containing the MyAlgorithm class to the file (section 1.2 or 1.3)
download our example CSV
in a separate file execute the following code snippet and then apply the algorithm as shown in our exemplary video:
from mad_gui import start_gui
from mad_gui.plugins import ExampleImporter
from my_algorithm import MyAlgorithm # you need to create this file and class, see below

start_gui(plugins=[ExampleImporter, MyAlgorithm])
1.2 Algorithm, which creates annotations to be plotted#
A plugin like this can be used to create annotations which span a region between to samples. Your algorithm may for example be able to find regions where the sensor was not moving. The GUI will plot the annotations automatically after it returns from your algorithm's process_data method. You can see an example in this GIF or this video from 02:04 to 02:20.
Adapting the working example
The code below is a working example. See 1.1 Overview for more information on how to execute this example. To adapt this example to your use case, you only need to modify the methods name and create_annotations of MyAlgorithm.
If you want to use other labels than the built-in "Activity", make sure to pass it to start_gui and then you can use it in process_data below.
"""This is the content of my_algorithm.py, which holds my first algorithm plugin."""

import warnings
from typing import Dict
import pandas as pd
from mad_gui import BaseAlgorithm
from mad_gui.models.local import PlotData
from mad_gui.components.dialogs.user_information import UserInformation

class MyAlgorithm(BaseAlgorithm):
    @classmethod
    def name(cls) -> str:
        name = "Algorithm to do ..."
        warnings.warn("Please give you algorithm a meaningful name.")
        return name

    def process_data(self, data: Dict[str, PlotData]):
        for plot_name, sensor_plot in data.items():
            # Use the currently plotted data to create annotations
            annotations = self.create_annotations(sensor_plot.data, sensor_plot.sampling_rate_hz)
            UserInformation.inform(f"Found {len(annotations)} annotations for {plot_name}.")
            if not all(col in annotations.columns for col in ["start", "end"]):
                raise KeyError("Please make sure the dataframe returned from create_annotations has the columns "
                           "'start' and 'end'.")
            sensor_plot.annotations["Activity"].data = annotations

    @staticmethod
    def create_annotations(sensor_data: pd.DataFrame, sampling_rate_hz: float) -> pd.DataFrame:
        """Some code that creates a pd.DataFrame with the columns `start` and `end`.

        Each row corresponds to one annotation to be plotted.
        """
        #########################################################################
        ###                                 README                            ###
        ### Here you create a dataframe, which has the columns start and end. ###
        ###  For each of the columns, the GUI will then plot one annotation.  ###
        ###               You could for example do something like             ###
        ###     starts, ends = my_algorithm_to_find_regions(sensor_data)      ###
        #########################################################################
        data_length = len(sensor_data)
        starts = [int(0.1 * data_length), int(0.5 * data_length)]  # must be a list
        ends = [int(0.4 * data_length), int(0.9 * data_length)]  # must be a list

        warnings.warn("Using exemplary labels, please find starts and ends on your own.")

        annotations = pd.DataFrame(data=[starts, ends], index = ['start', 'end']).T
        return annotations
If you want to know more about the data type Plot Data, which is used in process_data, please refer to the regarding documentation. However, you can get along without knowing anything about Plot Data:
1.3 Algorithm, which creates features for existing annotations#
A plugin like this can be used to calculate features for annotations that are already visible in the GUI. For example the user might have created annotations manually or by using an algorithm as described in 1.2 Algorithm, which creates annotations to be plotted.
Now, you might want to know the mean value of the sensor signal in each of the annotated regions. For this task you can create an algorithm as we describe it in this section. After execution of the algorithm, the GUI will take care for showing the results as soon as the user hovers of the annotation with the mouse, as you can see in this GIF or this video from 02:21 to 02:39.
Adapting the working example
The code below is a working example. See 1.1 Overview for more information on how to execute this example. To adapt this example to your use case, you only need to modify the methods name and calculate_features of MyAlgorithm.
If you want to use other labels than the built-in "Activity", make sure to pass it to start_gui and then you can use it in process_data below.
"""This is the content of my_algorithm.py, which holds my first algorithm plugin."""

import warnings
from typing import Dict
import pandas as pd
from mad_gui import BaseAlgorithm
from mad_gui.models.local import PlotData
from mad_gui.components.dialogs.user_information import UserInformation

class MyAlgorithm(BaseAlgorithm):
    @classmethod
    def name(cls) -> str:
        name = "Algorithm to do ..."
        warnings.warn("Please give you algorithm a meaningful name.")
        return name

    def process_data(self, data: Dict[str, PlotData]):
        """Calculate a feature for all annotations of type "Activity" that exist in the plots.

        This method automatically receives the plotted data and annotations from the plot,
        as soon as the user presses the `Use Algorithm` button and selects this algorithm.
        """
        # iterate over all existing plots
        for plot_name, plot_data in data.items():
            if plot_data.annotations["Activity"].data.empty:
                UserInformation.inform(
                    f"There are no annotations in the plot {plot_name}. "
                    f"Therefore nothing is analyzed."
                )
                return

            # iterate over all labels in this plot
            annotations = plot_data.annotations["Activity"].data
            for i_activity, activity in annotations.iterrows():

                # If you want, you can skip annotations that have a certain description
                # However, in this example we do not care for that
                # if activity.description == ...:
                #     continue

                # get the sensor data between start and end of the current annotation
                activity_data = plot_data.data.iloc[activity.start : activity.end]

                # calculate a feature for this part of the data
                feature_string = self.calculate_feature(
                    activity_data, plot_data.sampling_rate_hz
                )

                # attach the result string to the annotation, such that it will automatically
                # be shown as soon as the user moves the mouse over the annotation
                plot_data.annotations["Activity"].data.at[i_activity, "description"] = feature_string

        UserInformation.inform("Algorithm executed. "
                               "Move the mouse over a label and wait for a pop-up to see the result in a pop-up.")

    @staticmethod
    def calculate_feature(sensor_data: pd.DataFrame, sampling_rate_hz: float) -> str:
        #######################################################################
        ###                        README                                   ###
        ###      Here you can calculate features for example like this:     ###
        ###      feature = my_algorithm(sensor_data, sampling_rate_hz)      ###
        #######################################################################
        feature = 42
        return f"The calculated feature for this label is: {feature}."
If you want to know more about the data type Plot Data, which is used in process_data, please refer to the regarding documentation. However, you can get along without knowing anything about Plot Data: